Boaty: Changing the status bar
Note: this is part 4 of a series of posts, aimed at building a React Native app from the ground up. If you haven’t already done so, it’s worth starting from the beginning of the series.
In part 3, we built the main functionality of our app - loading a random image of a boat. In this post, we are going to improve the look and feel of the app by modifying the part of the screen occupied by the status bar.
Background
By default, the status bar is displayed differently on iOS and Android.
On iOS, the status bar floats over the app content. As a result, the top-most part of the full-screen image in our app sits beneath the status bar. Since the status bar is rendered with dark text, if the image contains a dark background, the text becomes illegible.
On Android, the status bar is separate from the app window. As a result, the image sits beneath the status bar.
We are going to improve the look and feel of our app by carrying out the following:
- On iOS, give the status bar a blurred background, so that dark text will be legible on a dark image.
- On Android, give our status bar a full colour background that matches the blue theme of the app.
iOS: adding a blurred background
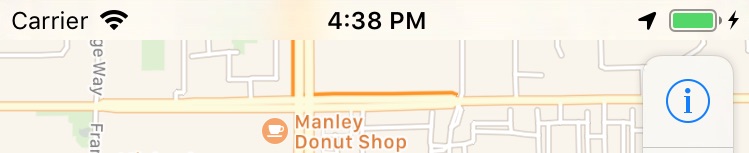
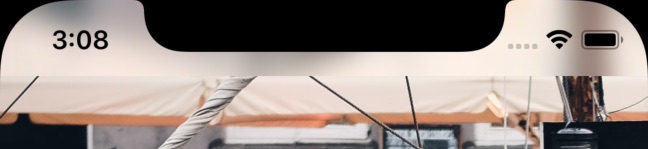
Blurring the background of the iOS status bar is a tried and tested approach taken by other apps - for example, here is the blur effect used by Apple Maps:
We are going to apply this blur effect to the iOS version of our app.
Method
To add the blur effect, we are going to use a third party library, react-native-blur. Similar to other React Native third party libraries, this module contains both JavaScript and native iOS/Android code:
- the JavaScript code provides a hook to interact with the native code from the app’s TypeScript files.
- the native code takes care of rendering the correct UI components for the specific platform.
As a result, third party code is often used as a component in the app’s TSX file, similar to React Native’s built-in components.
In this case, we need to install and import react-native-blur as follows:
- Open a terminal at the root of the project and run:
npm install react-native-blur   # Installs the module from the npm registry
react-native link react-native-blur   # Links the native code into the ios/android folders
Follow the instructions in the installation guide to make any other necessary changes to the native codebase.
Note: The install/link process is a common one to perform when installing third party React Native modules. Be sure to check out the documentation for the module to discover the specific installation instructions.
Now that the blur module is installed, we can use it:
- Open
src/components/ImageViewer.tsx - At the top of the file, below the line that imports the React Native components, add the following import:
import { BlurView } from 'react-native-blur';- Inside the TSX, below the
<Image />declaration, add the following:
<BlurView style={styles.statusBarBlur} blurType="light" blurAmount={8} />- Next, add the following object to the stylesheet:
statusBarBlur: {
  position: 'absolute',
  top: 0,
  left: 0,
  right: 0,
  height: 20,
}- In a terminal, browse to the project root and run
npm start. - In a separate terminal, browse to the project root and run
react-native run-ios.
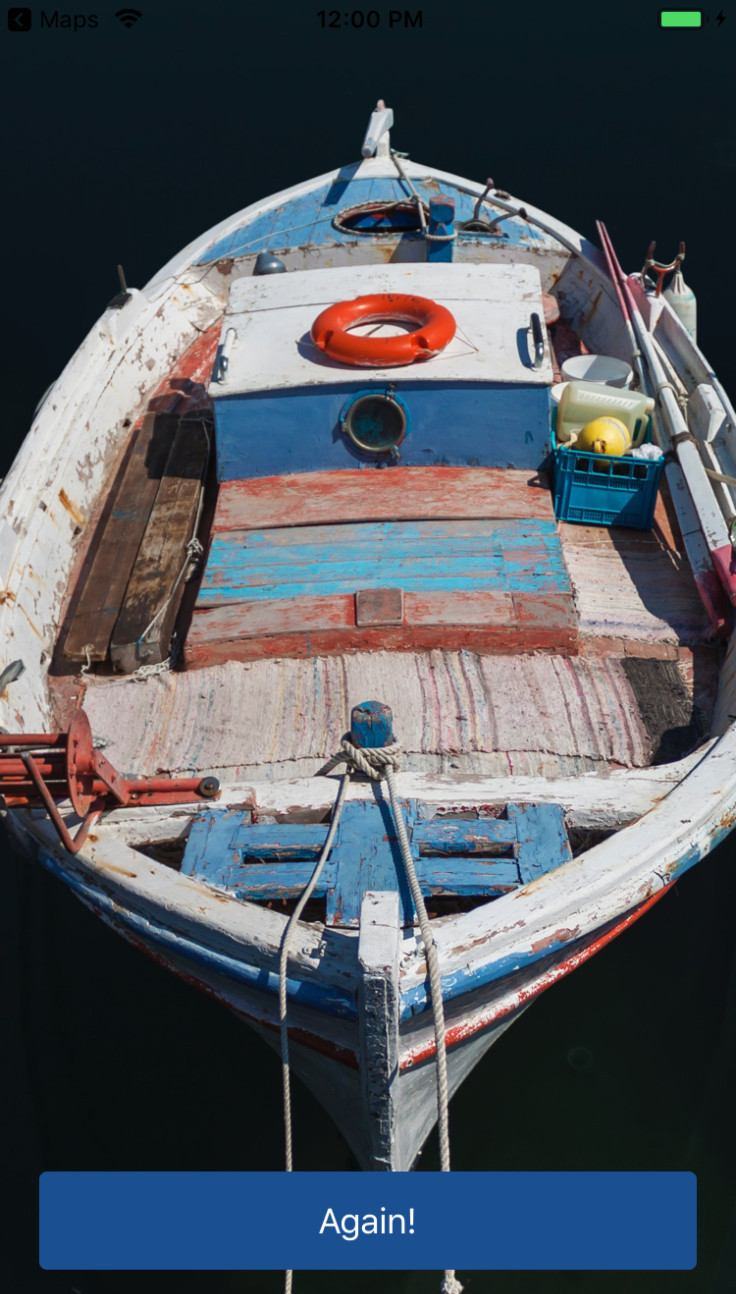
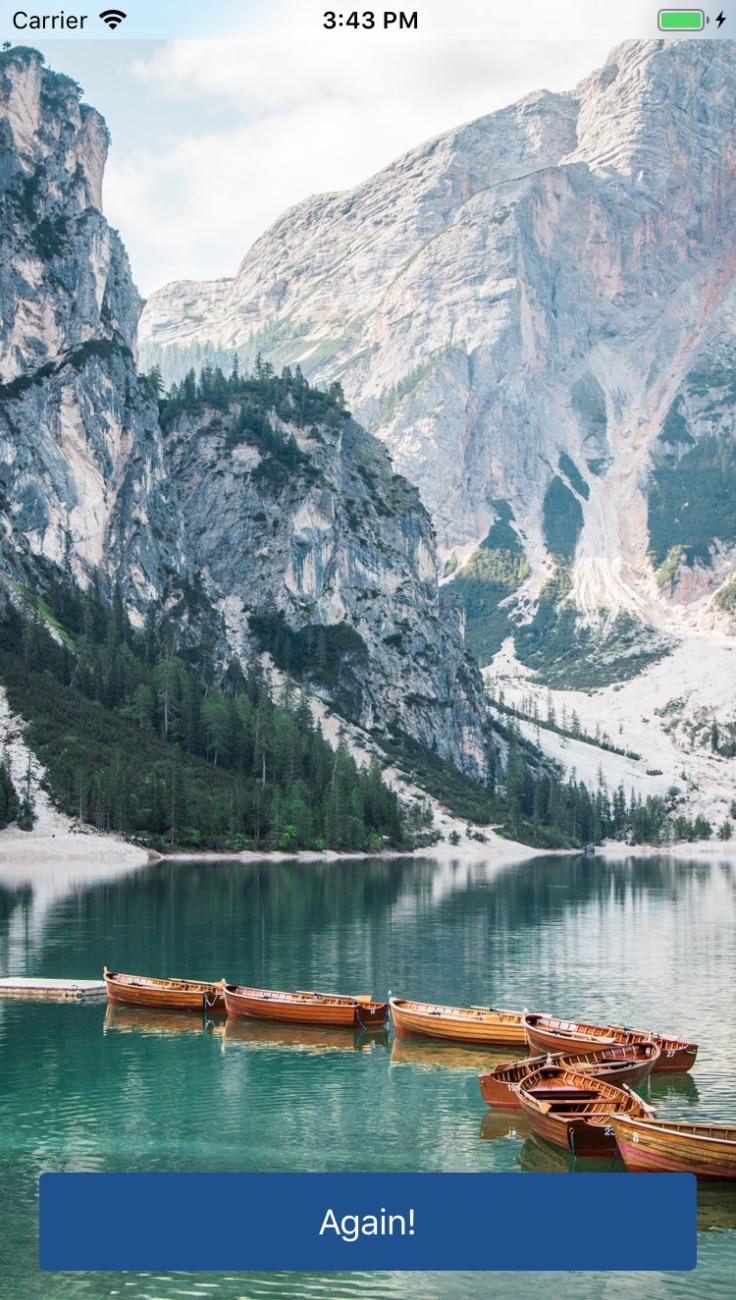
Your app should open in the iOS simulator and a blur effect should appear under the status bar, as follows:
The notch
So far, we’ve been testing the app running on an iPhone 6 simulator. Recent advancements in iPhone design has produced a number of devices with a notch - at the time of writing, we have the iPhone X, XS, XS Max and XR which all include a notch.
Let’s now check what the app looks like on a notched device. In the terminal run the command:
react-native run-ios --simulator="iPhone X"This should open the app in a new iPhone X sized simulator.
Immediately, it’s obvious there is a problem:

The issues stems from the fact that the status bar height varies on different devices:
- Regular iPhones (without a notch): status bar is 20px tall
- Notched iPhones: status bar is 44px tall
Our app currently sets the <BlurView> height to 20, but we now need some conditional logic to set the height according to the device type.
To fix this, let’s install another module to help determine the height of the status bar, along with the TypeScript typings:
npm i react-native-status-bar-height
npm i -D @types/react-native-status-bar-height
We can now make the following changes to ImageViewer.tsx:
- Import the new module, and use it to determine the status bar height:
import { getStatusBarHeight } from 'react-native-status-bar-height';

const statusBarHeight = getStatusBarHeight();- Change the
statusBarBlurstyle to:
statusBarBlur: {
  position: 'absolute',
  top: 0,
  left: 0,
  right: 0,
  height: statusBarHeight,
}
Refresh the app in the iPhone X simulator (Cmd-R), the whole status bar should now be covered correctly.
Android
Let’s shift our attention to the Android version of the app.
Ignoring BlurView
The code we’ve written so far is just for iOS. On Android, we don’t want the <BlurView> to be shown at all.
We can use the Platform API from React Native to conditionally run code depending on the platform. We’re going to use this to only render the <BlurView> on iOS:
- In
ImageViewer.tsx, addPlatformto the list of named imports fromreact-native. - Above the
IPropsinterface, add the following code:
const isIOS = Platform.OS === 'ios';- Modify the
<BlurView>declaration in the TSX to the following:
{
  isIOS ? (
    <BlurView style={styles.statusBarBlur} blurType="light" blurAmount={8} />
  ) : null;
}
Change status bar colour
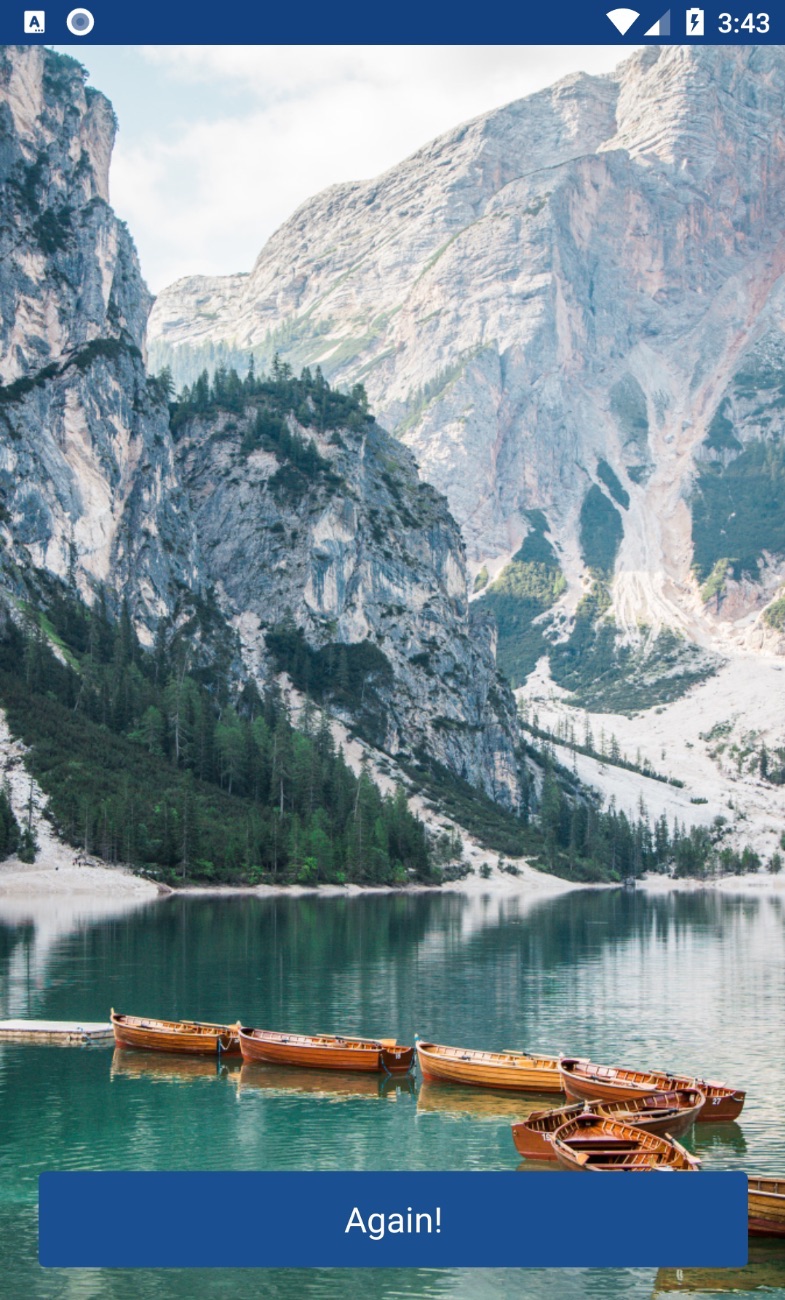
To change the colour of the status bar on Android, we need to work inside the android folder.
Android apps are commonly themed using the Material Design system. Here, a theme is assigned a set of colours, such as the primary and accent colours.
The status bar colour is governed by the primary theme colour of the app - specifically, a dark variant of the colour. We will add a primary and primary dark colour definition to the app, which Android will automatically use for the status bar colour. The colour that we’ll choose will be the Boaty blue colours, currently used by the button in the app.
- Create a file
android/app/src/main/res/values/colors.xml. - Paste the following contents to that file:
<?xml version="1.0" encoding="utf-8"?>
<resources>
    <color name="primary">#1a5091</color>
    <color name="primary_dark">#13407e</color>
</resources>- Open the file
android/app/src/main/res/values/styles.xml. - Replace the text
<!-- Customize your theme here. -->with the following:
<item name="android:colorPrimary">@color/primary</item>
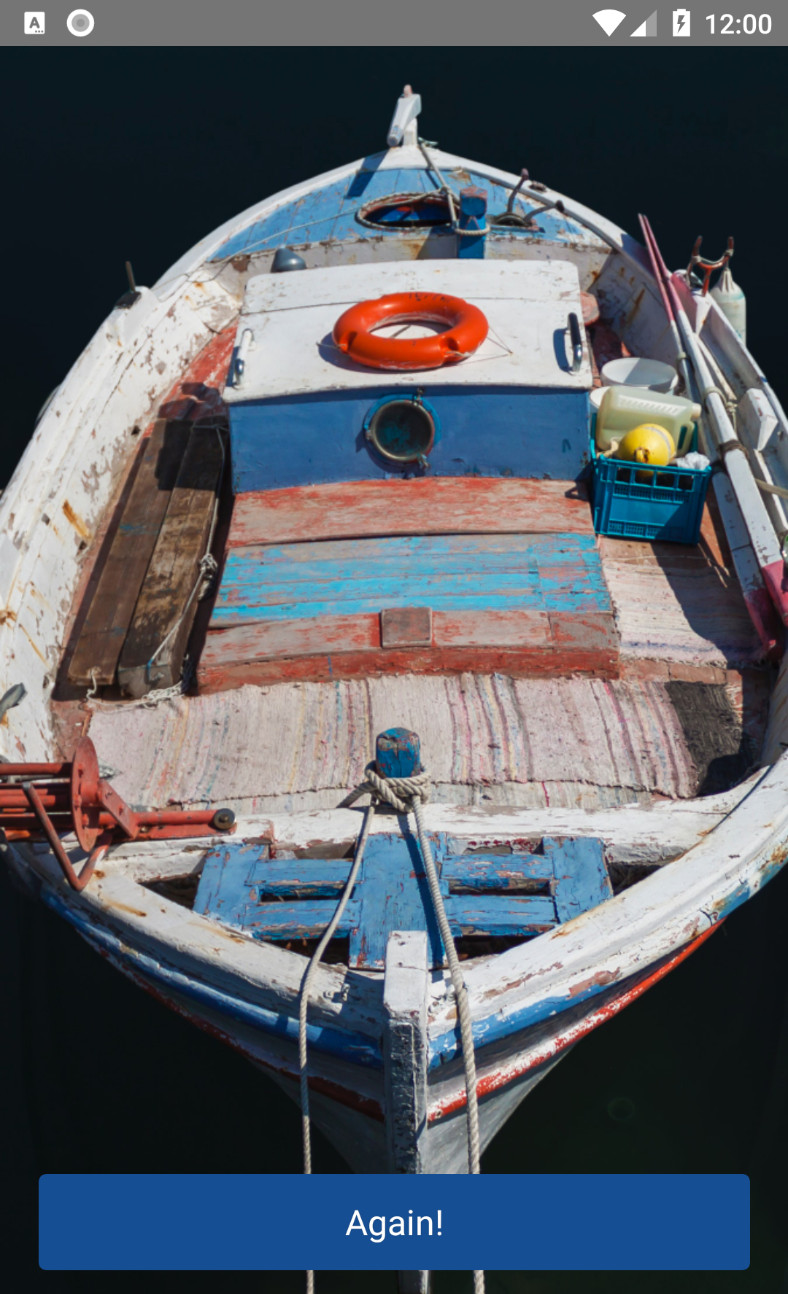
<item name="android:colorPrimaryDark">@color/primary_dark</item>Now, go to the terminal and run react-native run-android. This will re-compile the Android app with the colour changes, and when loaded, the app should show a nice blue status bar.
End Result
Summary
We’ve improved the look and feel of our app by:
- adding a blur effect behind the status bar on iOS, meaning that the status bar text is always legible.
- giving the status bar background a different colour on Android, to match our app’s theme.
The code for this section can be found on the accompanying GitHub repo, make sure to check out the changes to the code from part 3.
If you’d like to learn more about building an app with TypeScript and/or React Native, I run in-person or remote workshops which walk through the fundamentals of building apps with these cutting-edge tools. If you are interested in learning more, let me know and I’d be happy to chat further!